
The next step is to generate your client assertion. You can use any online JWT tool for this, for example Dinochiesa JWT. You can also sign the token in your own application code as long as it supports RS256.

Step 1: Create the JWT header

Use this JSON as the decoded header:
{
  "alg": "RS256",
  "typ": "JWT"
}
This tells the signer to use RSA with SHA-256 and identifies the token as a JWT.

Step 2: Create the JWT payload

Use this JSON as the decoded payload and replace the placeholders with your own values:
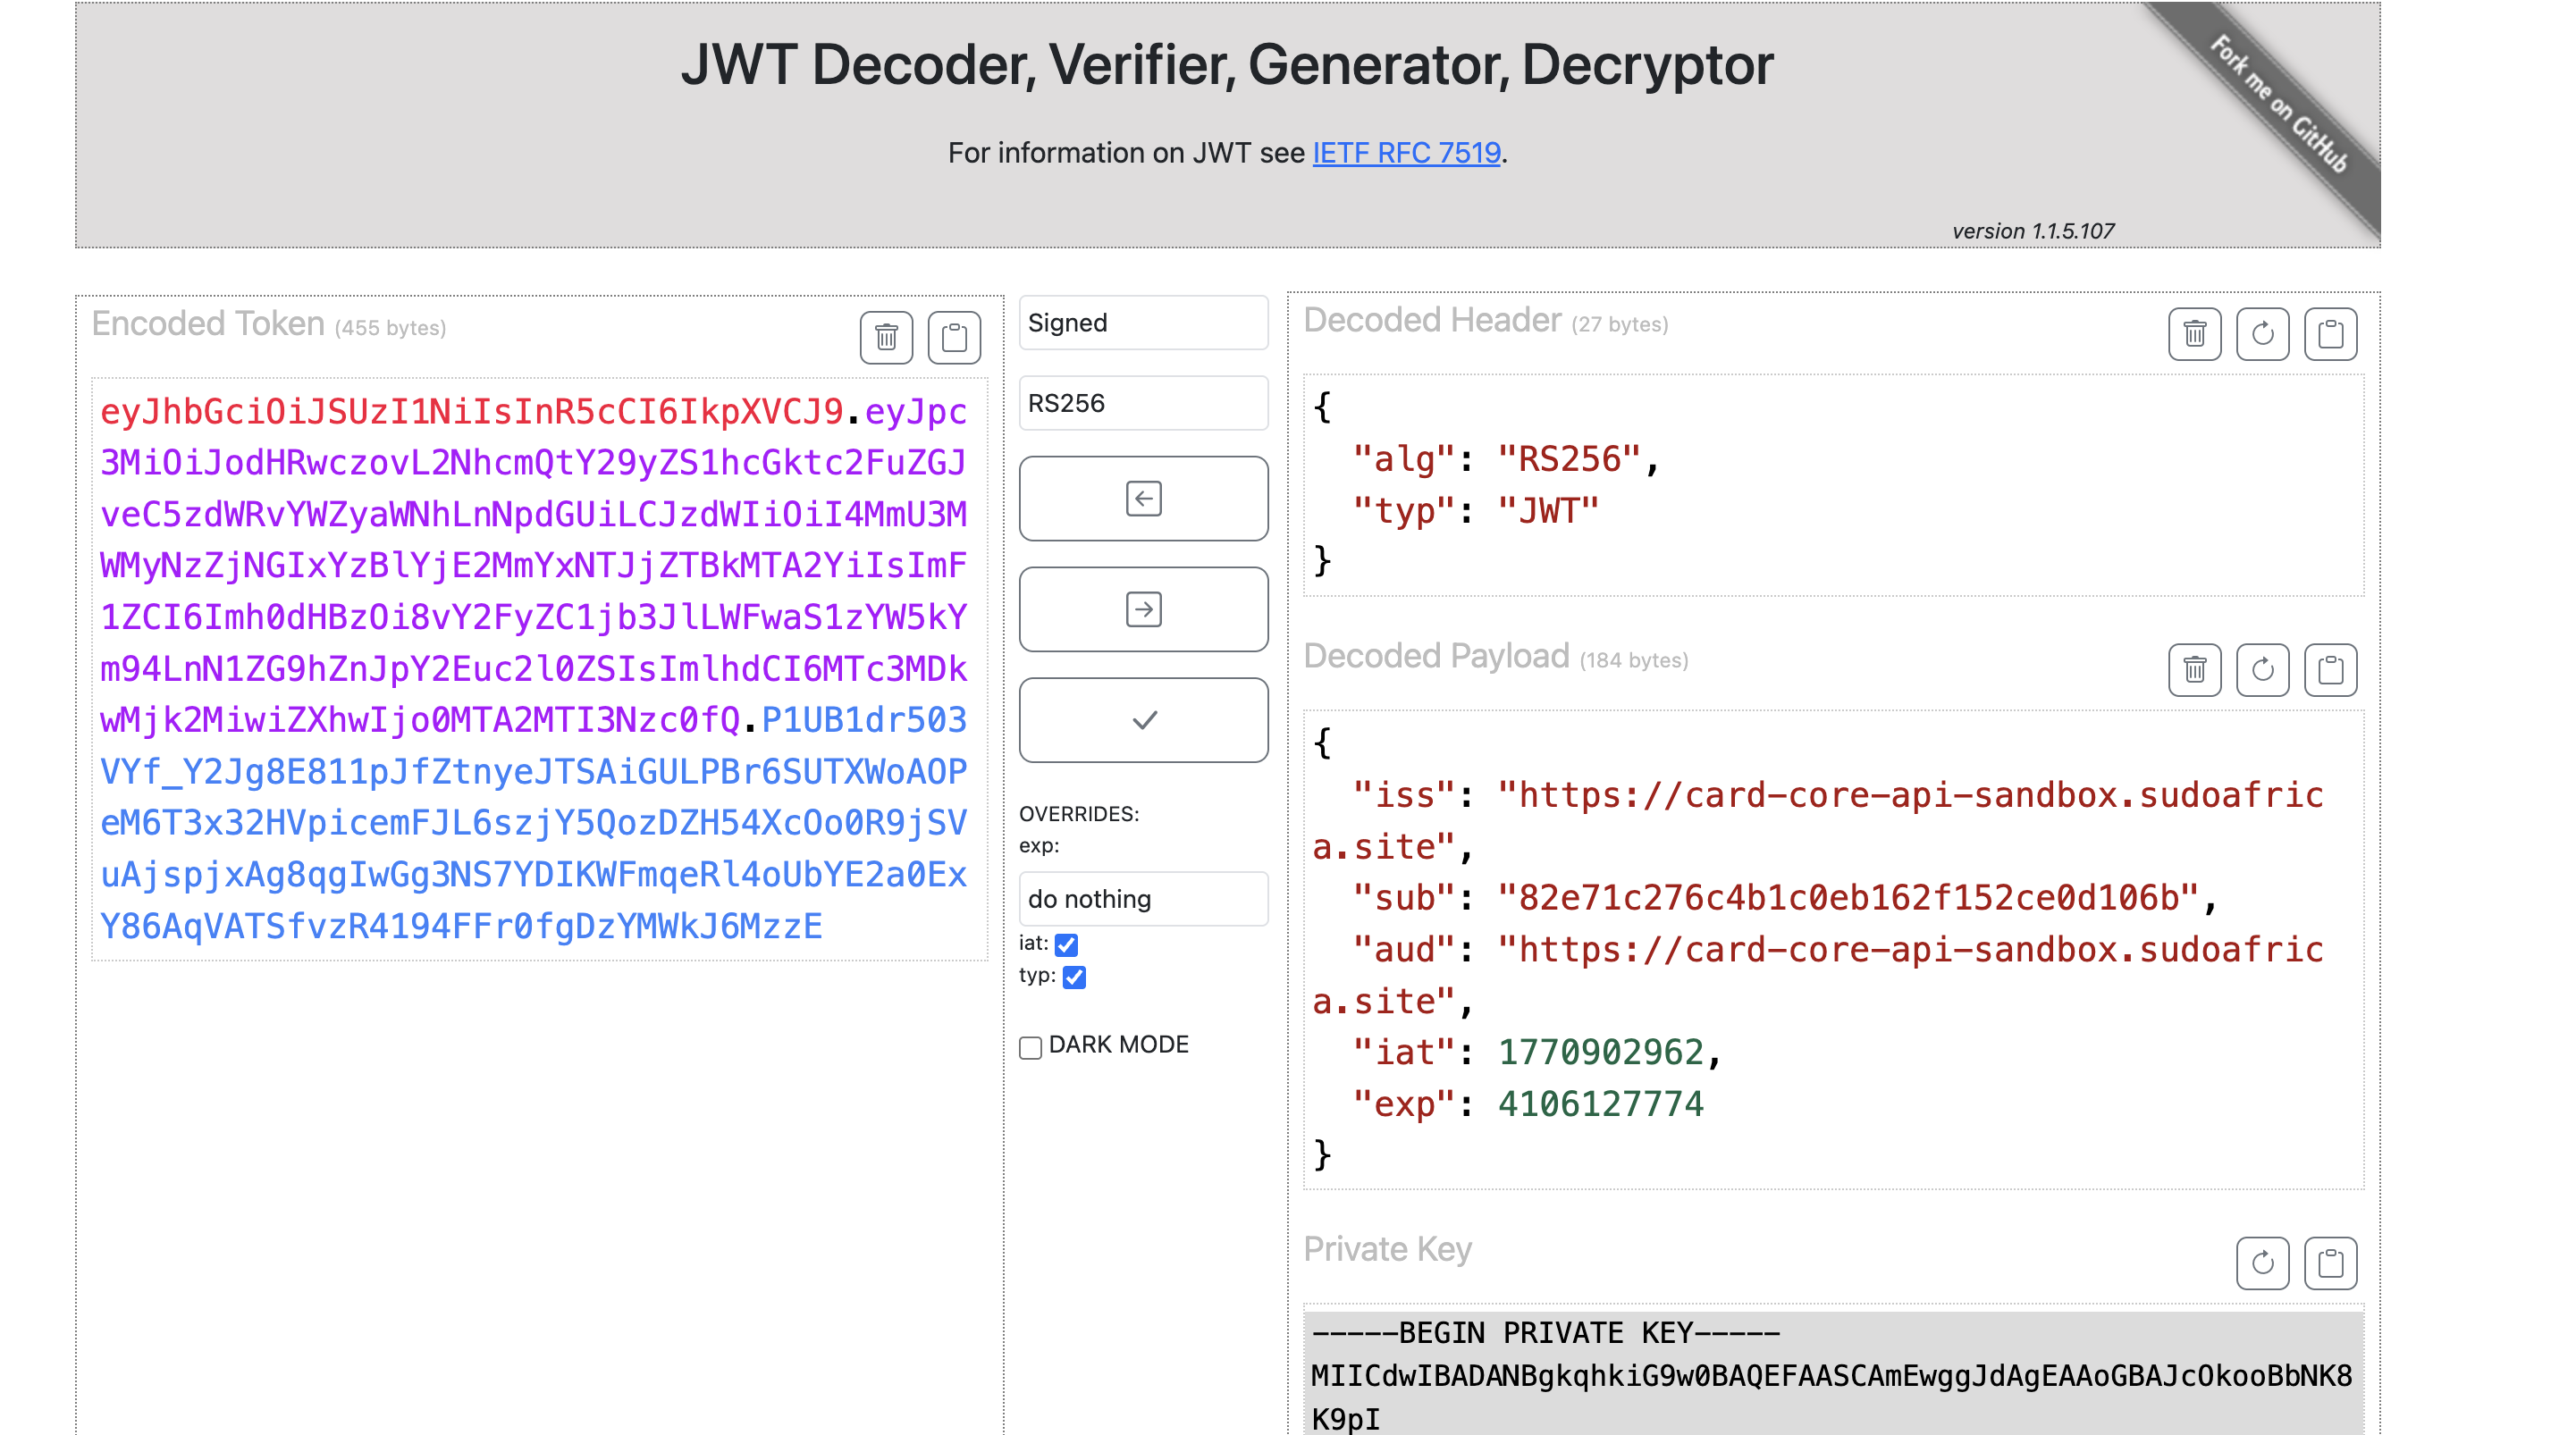
{
  "iss": "{{Company Url}}",
  "sub": "{{OAuth Institution Client ID}}",
  "aud": "{{Cardcore Environment}}",
  "iat": "{{Issued At}}",
  "exp": "{{Expiry}}"
}
Company Url: Your Company URL OAuth Client ID: Can be gotten from your Cardcore dashboard. Cardcore Environment: This is https://card-core-api.sudoafrica.site for production and https://card-core-api-sandbox.sudoafrica.site for sandbox. Issued At: This is the timestamp of the date you create the client assertion JWT. You can generate a timestamp using Epoch Converter. Expiry: This is the timestamp of the date you want the client assertion JWT to expire. Dinochiesa flow Note: The timestamp format should look like this: 1639806203.

Step 3: Sign the token with your private key

In this example, the client assertion is generated using Dinochiesa JWT. In the Private Key section, paste the private key you generated earlier when creating your app on the dashboard and leave the public key section empty. Use that key to sign the header and payload with RS256. The signed output is your client assertion.

Step 4: Exchange the assertion for an access token

After you generate the client assertion, send it to OAuth Token to create your access token.