

Step 1: Open the OAuth apps page
Sign in to the dashboard and open the OAuth section for your institution. This is where you manage the apps that can request tokens on your behalf.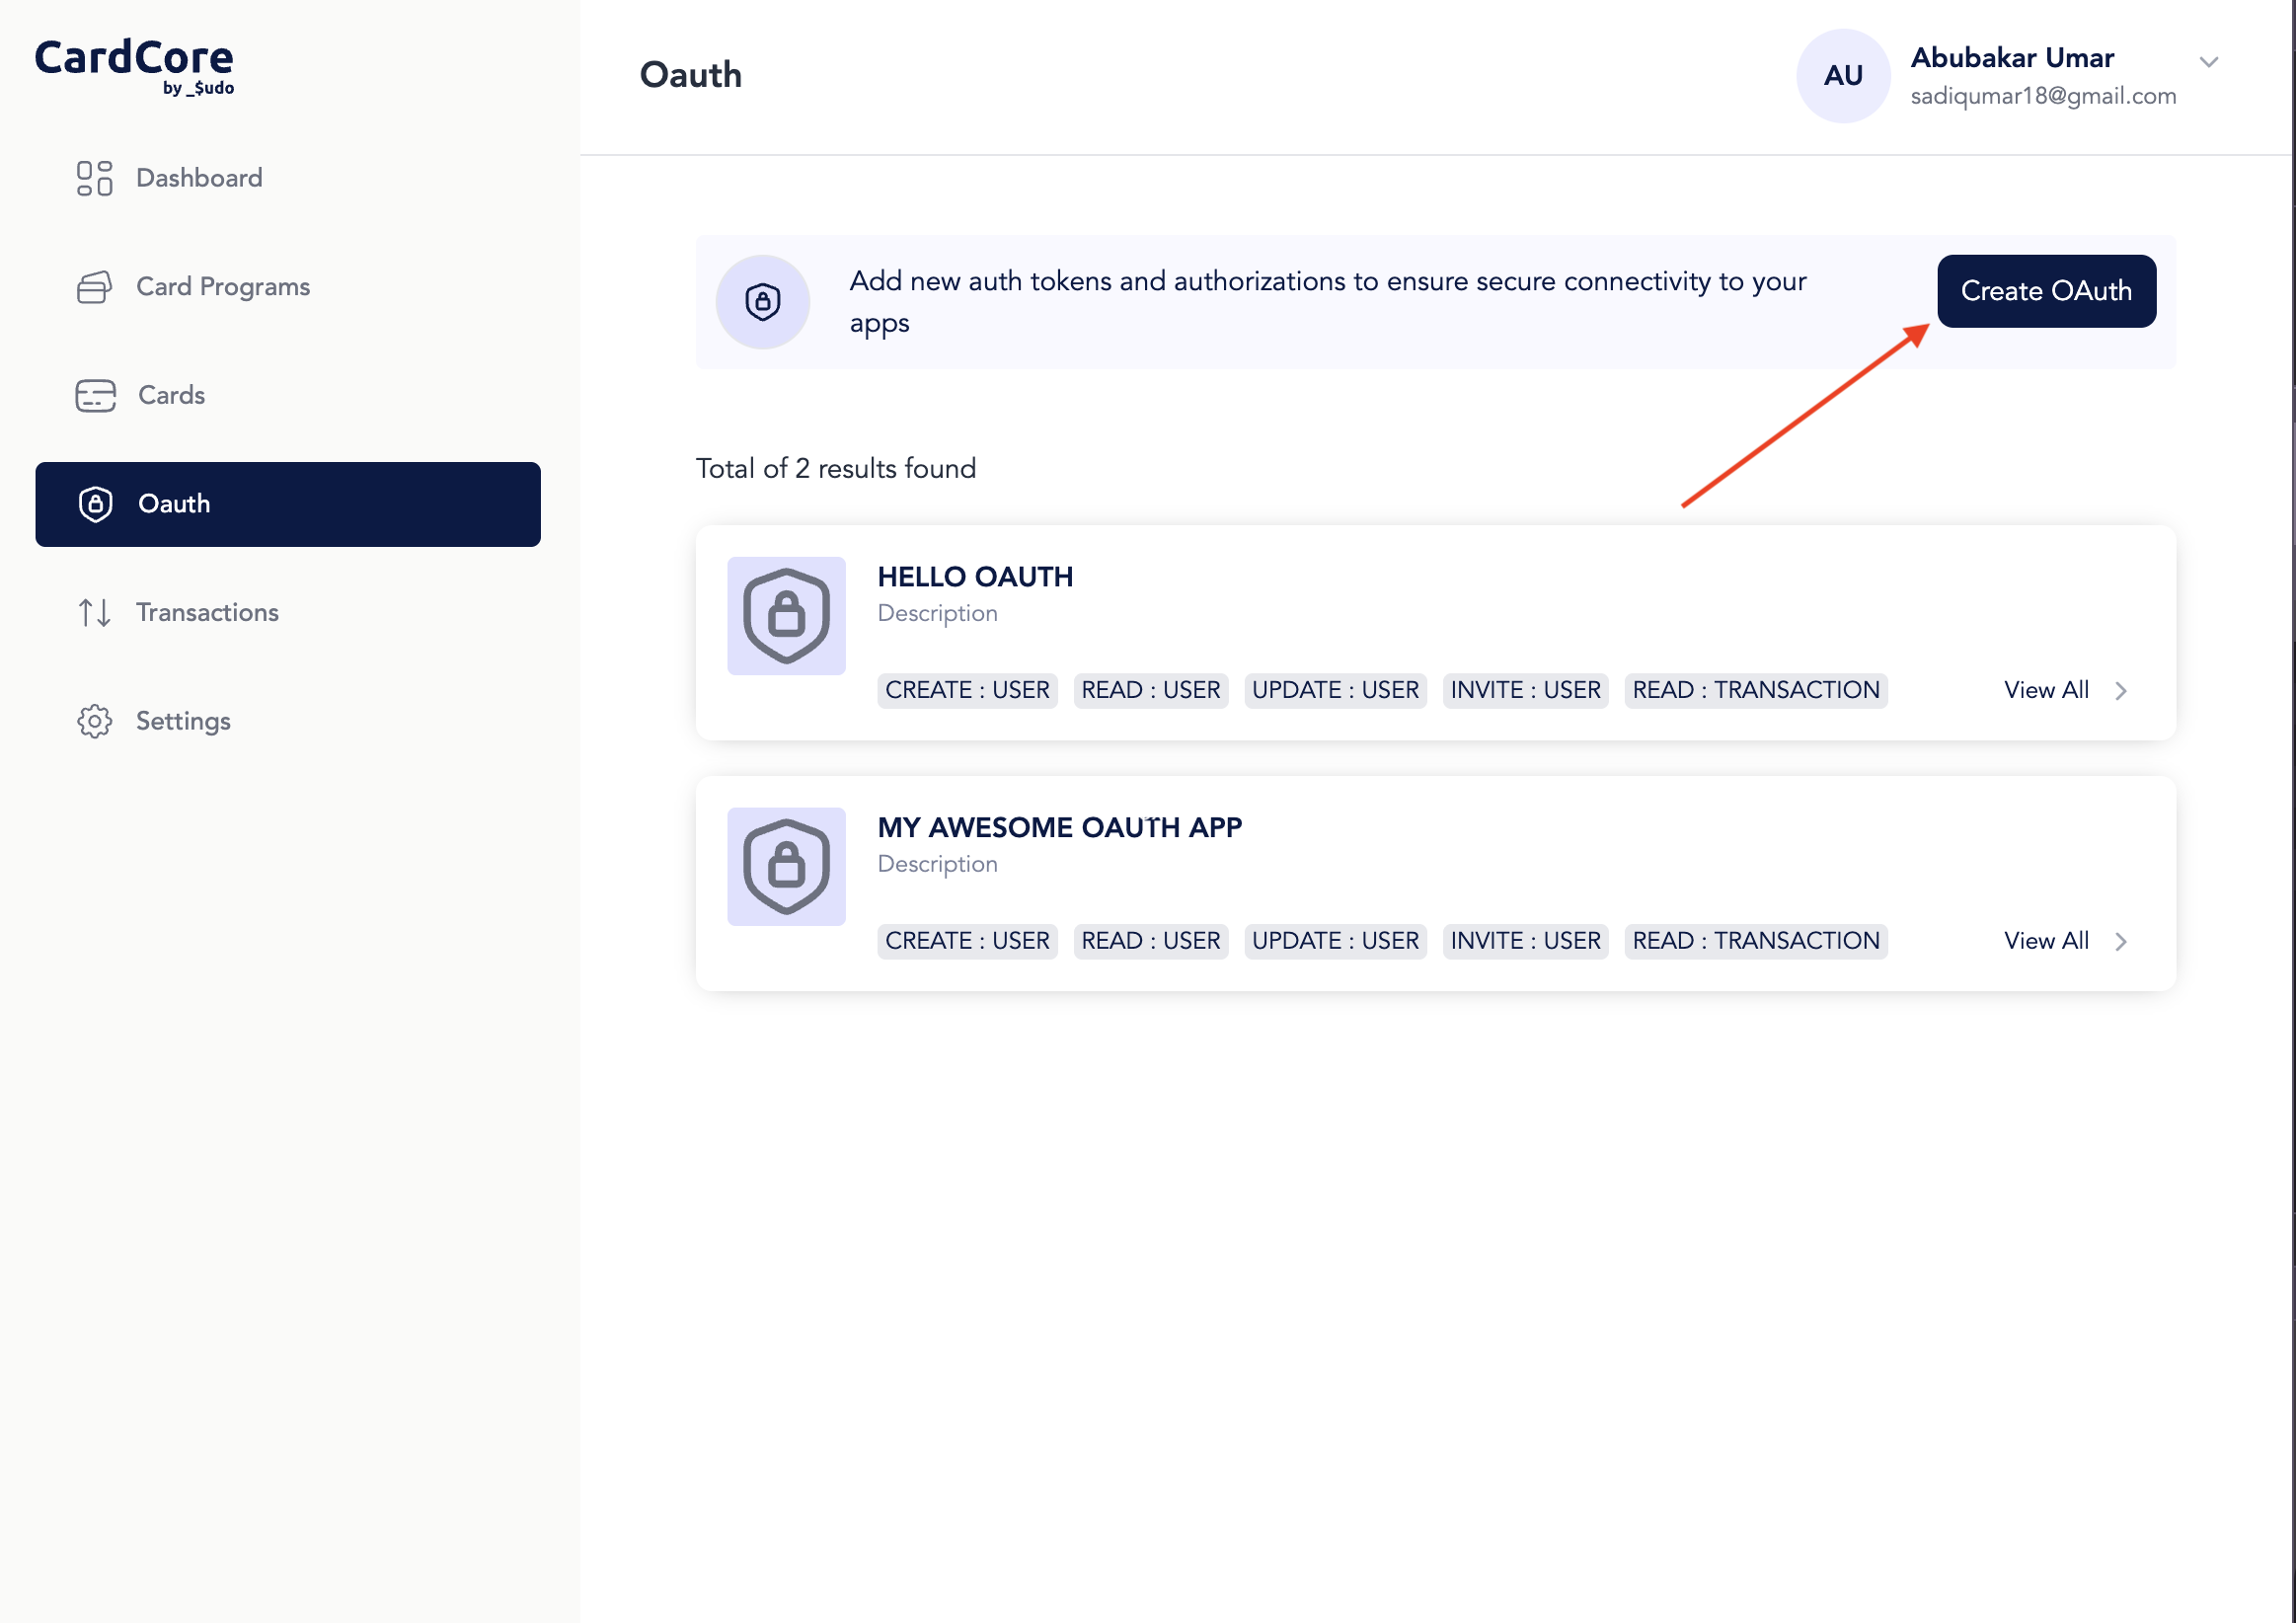
Step 2: Start a new app
Create a new OAuth application from this page. Use a clear app name so your team can recognize it later.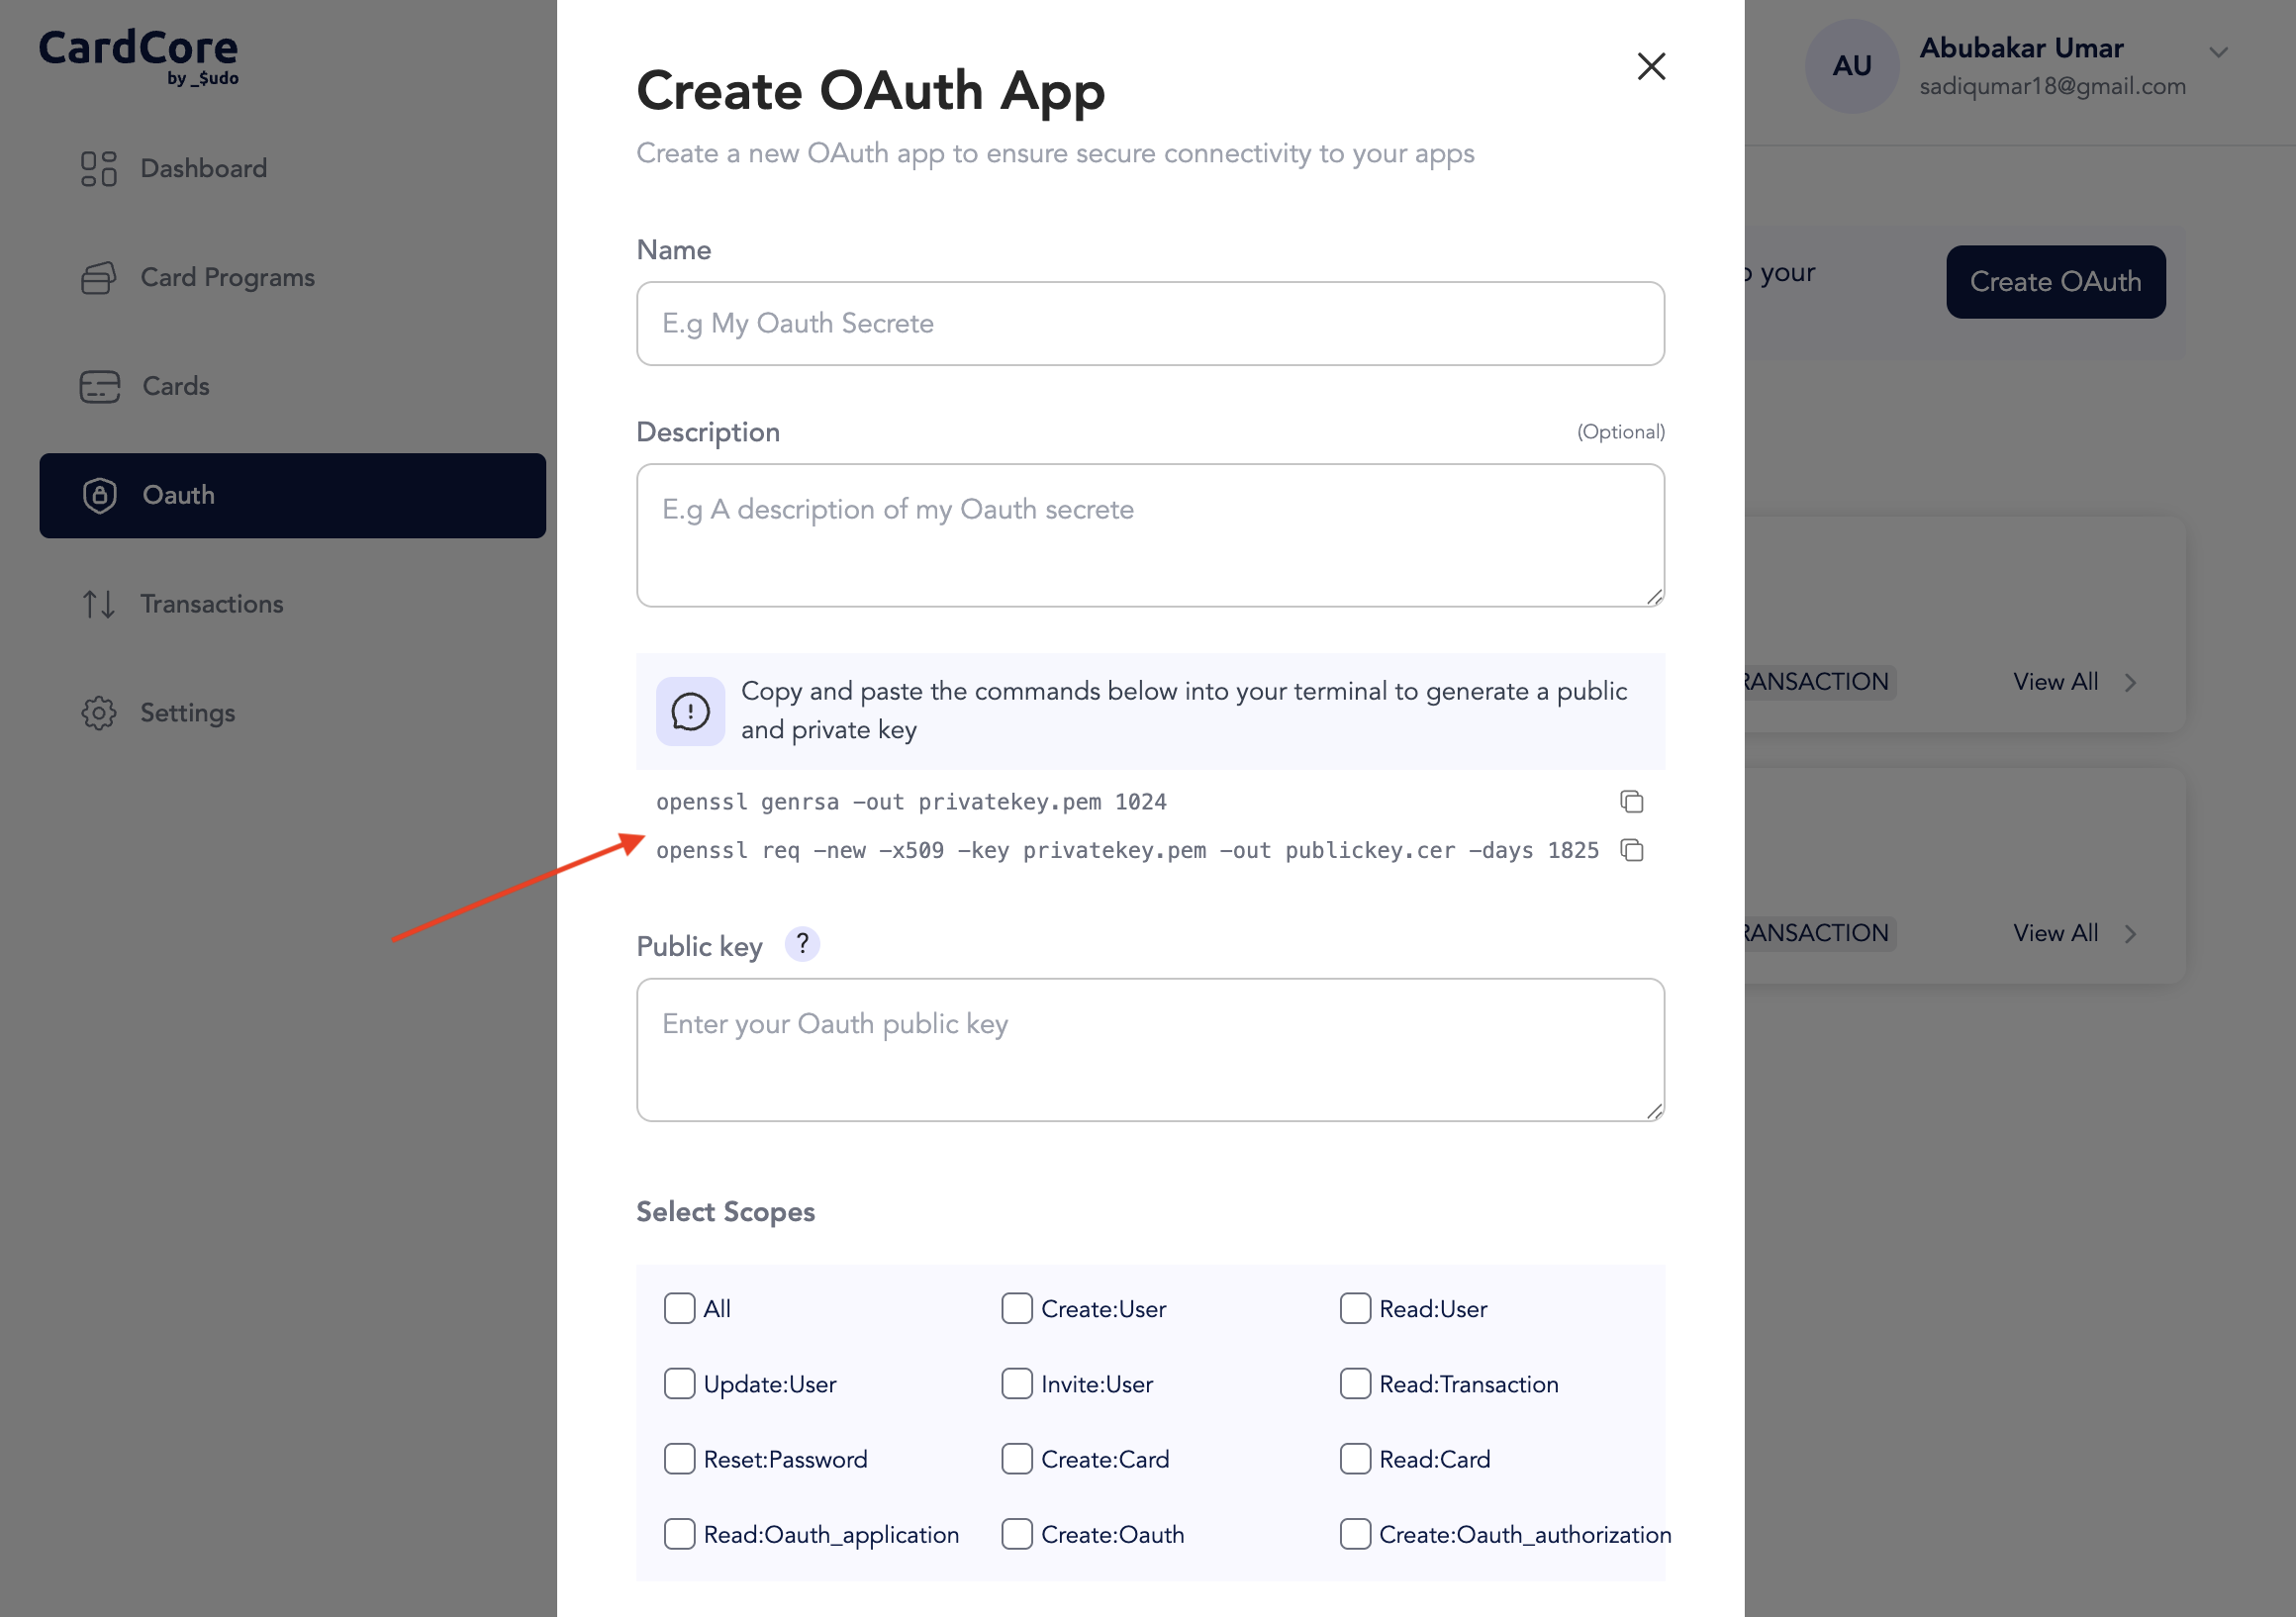
Step 3: Generate and add your public key
Click the information icon beside X509 Public Key to see how to generate the public key. Copy and run the commands below in a terminal or command prompt to generate your private key and public key certificate. Enter the required information when prompted and save the generated keys in a secure directory for later use. Private key:App details
These are the fields you provide when you create an OAuth application.The name your team will use to recognize this app.Use a clear name, for example
Mobile Banking App or Core Banking Service.A short note that explains what this app is for.
The certificate public key for this app.Paste the content of the public key certificate you generated for the app. Keep the matching private key safe and do not share it.
The permissions this app should have.For example,
READ lets the app read allowed information, while WRITE lets it perform allowed actions.How this app will request access.Use
client_credentials for server-to-server access. Use authorization_code when a user must approve access.The web addresses the system can send users back to after they approve access.This is required when
grantType is authorization_code.The website for this app or business.
A link to the app’s logo or icon.
Set this to
true if this is an official app owned by your institution.Step 4: Save the app and copy the client ID
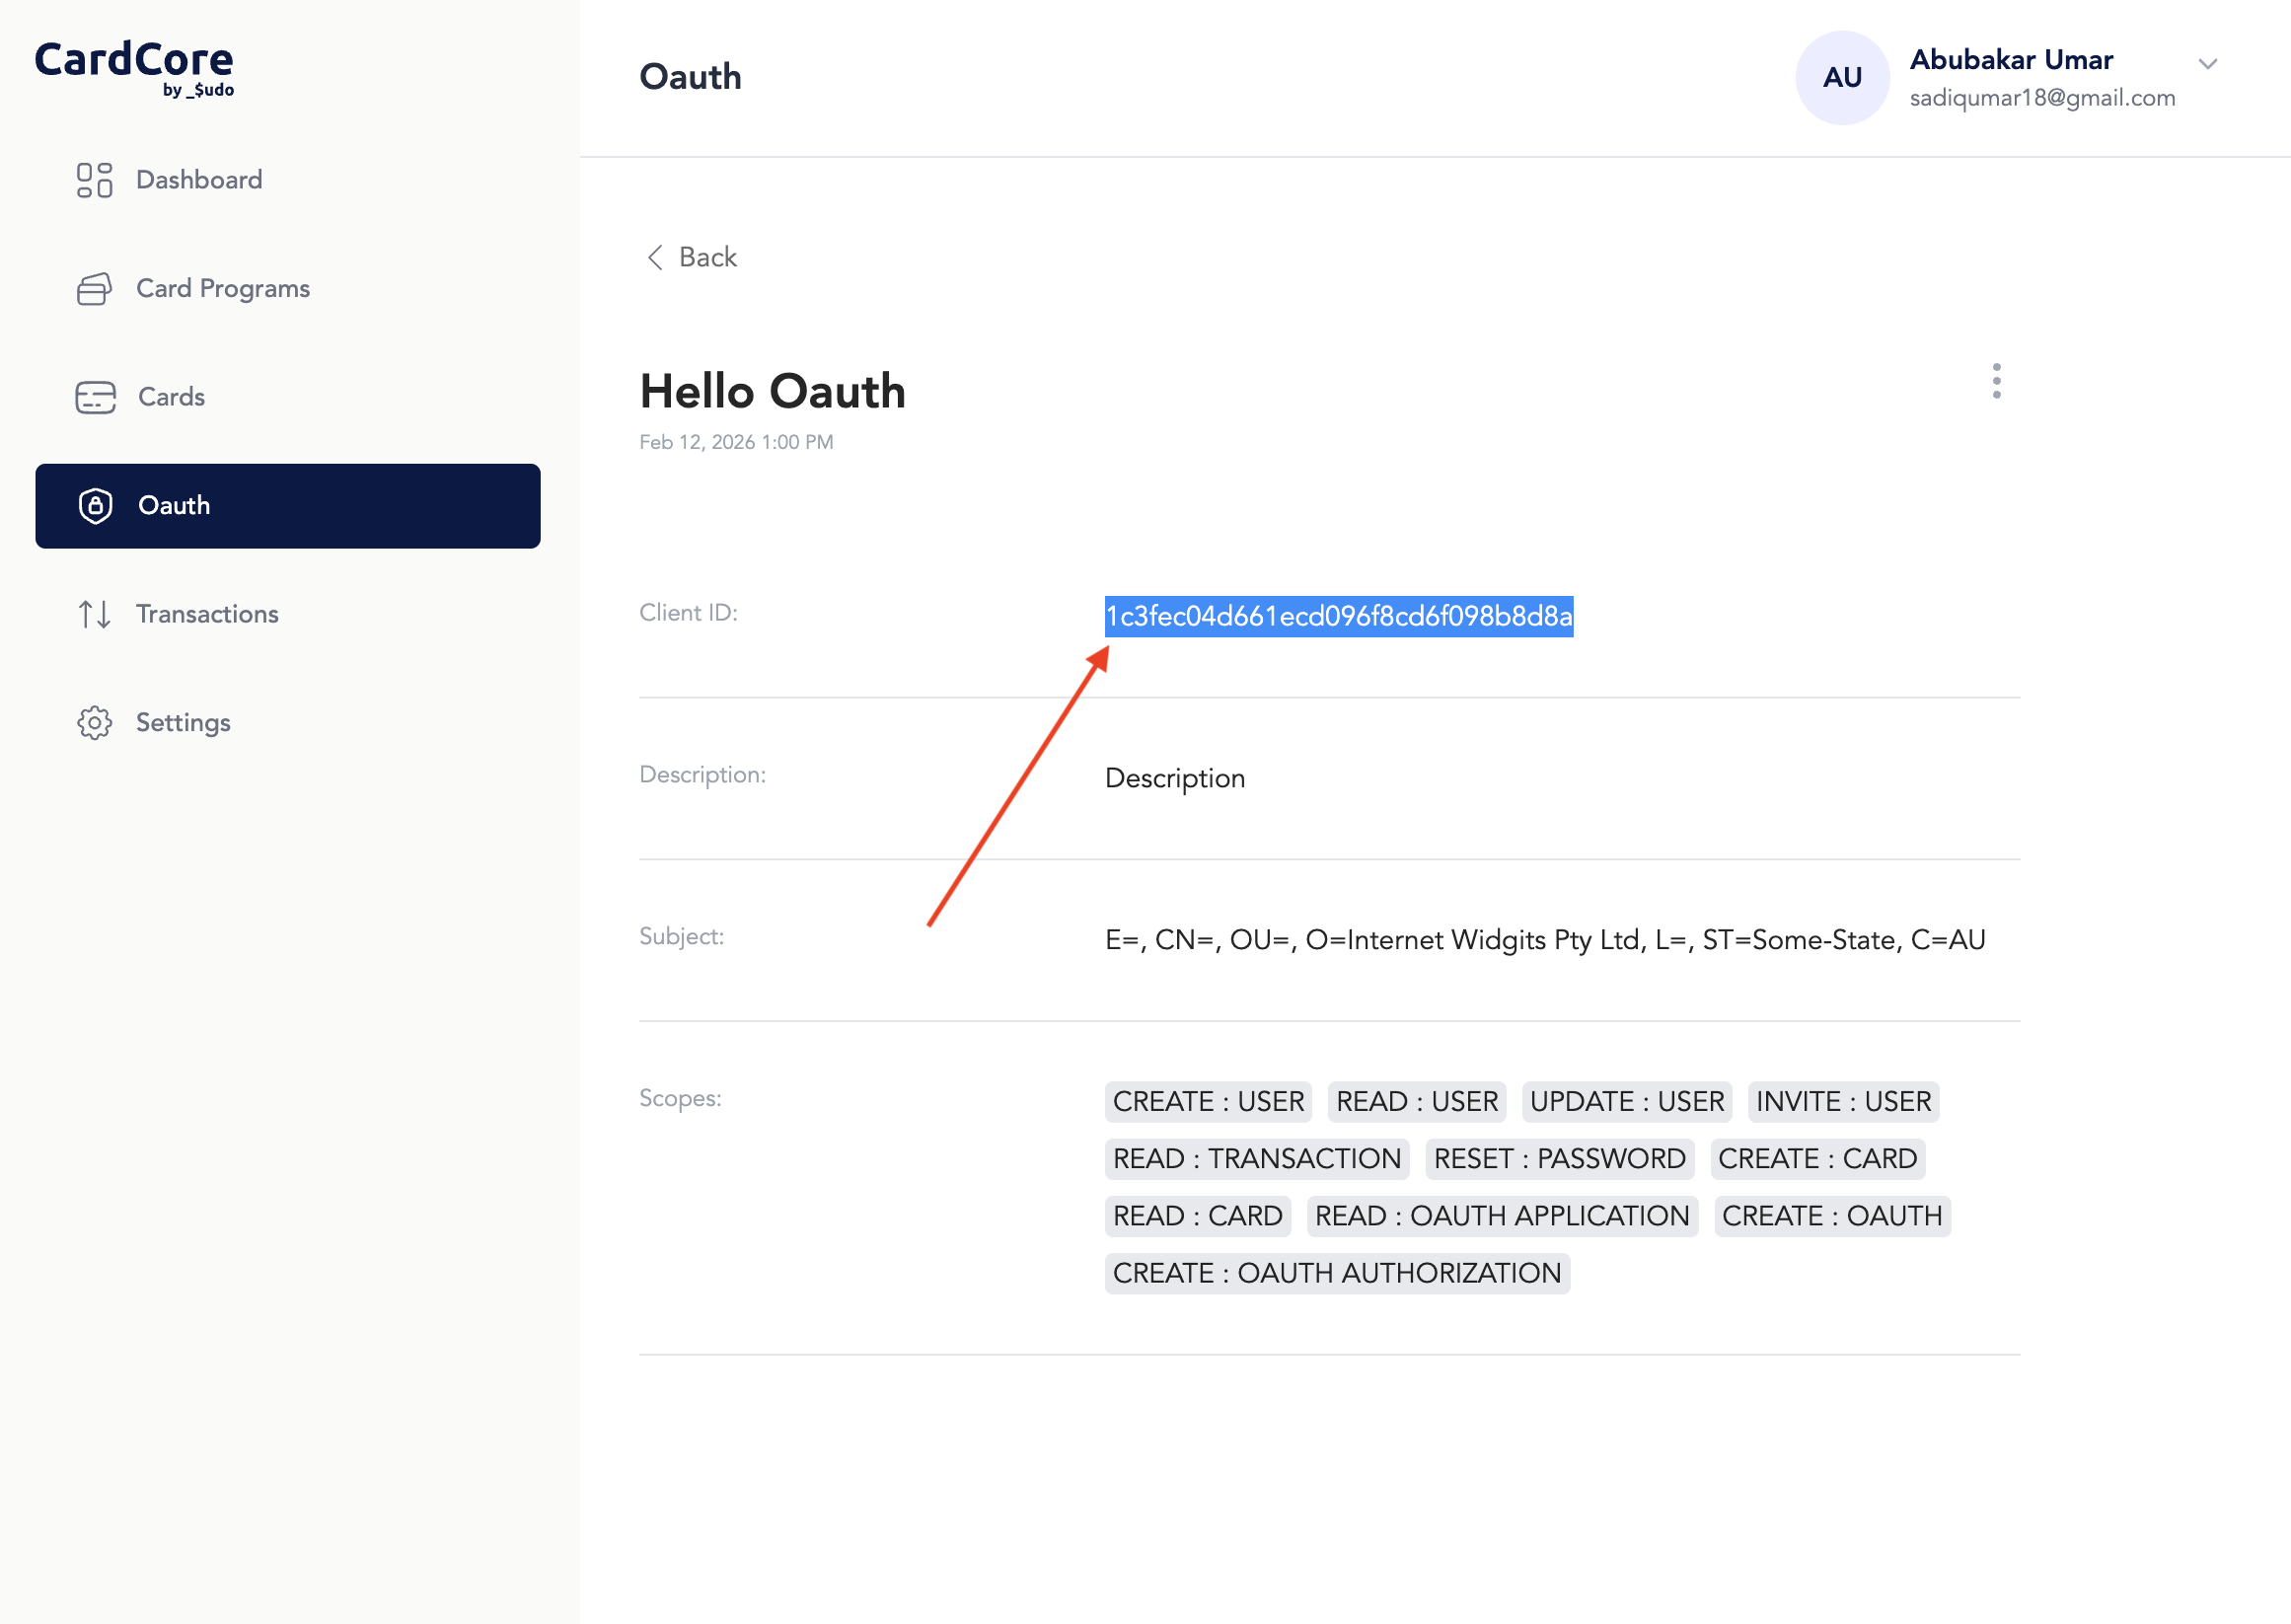 After you save the app, open the app details page and copy the client ID. You will use this value as
 {{OAuth Institution Client ID}} when you build your client assertion.